The evening before you have to go back to school/work after a long weekend or vacation always sucks. At least it always has for me. Even as a kid I remember the dread I felt as I crawled into bed the night before the first day of school after summer vacay was over.
To soften the blow, I needed a snack. So, the hubs and I decided to whip out the new food processor and make some dips to go with our chips and crackers. They turned out so well that I indeed felt a little better after snacking.
Warning: Do not make homemade salsa with anything less than great tomatoes. Since summer IS tomato season, it’s worth making a bunch of the stuff this time of year to get your fill.
SUMMER SALSA
– 5 to 6 small to medium tomatoes (2-3 cups)
– 1 to 2 chopped jalapeños, seeds removed (depending on how spicy you like things)
– 1/4 cups packed cilantro leaves
– 1/2 tsp. salt
Combine all ingredients in a food processor and pulse until combined. If you are without a food processor, you can chop your tomatoes and cilantro by hand and just mix to combine. Refrigerate for a couple of hours to allow the flavors to meld together. Serve on just about everything!
AVOCADO YOGURT DIP
2 sliced avocados
1/2 cup Greek yogurt (not nonfat)
1 jalapeño, seeded and chopped
1/2 cup packed cilantro leaves
1/2 tsp. garlic powder
1/2 tsp. salt
Combine all ingredients in a food processor. Serve with pita or tortilla chips, or crackers.
All these years I’ve been hitting up Chinese delis for mediocre Chinese BBQ pork that’s been dyed a truly frightening shade of pink, or making due with tough and flavorless meat. All these years…and I could’ve been making it at home.
I was inspired by this recipe I found on the blog Appetite for China. The recipe seemed so easy. Too easy. But easy enough for me to try without fear of failure. At the very least it would be a nice slab of marinated pork belly to enjoy. I even made it gluten free by removing the hoisin sauce (which frankly I didn’t miss) and using gluten free soy sauce.
What I removed from the oven exceeded my wildest expectations. Roasted to perfection in such a short amount of time and with minimal effort. Heck, even with two little kids running around upstairs, I was able to pull out this juicy piece of meat and make it look like I slaved over it all day:
You have to try this recipe. Period.
2 lbs. whole pork belly, skin removed 4 Tbsp. Chinese rice wine or dry sherry 4 Tbsp. dark soy sauce 4 Tbsp. sugar 1 tsp. five-spice powder 2 Tbsp. honey
– In a large bowl, mix together the rice wine, soy sauce, sugar, and five-spice powder. Rub the pork belly with the marinade mixture and marinate for 2 to 3 hours, or preferably overnight, in the fridge.
– Preheat the oven to 325°F.
– Remove excess marinade and place the pork in a roasting pan. Brush the top with the honey. Roast the pork for about 25 minutes. Flip over the pork belly slab and brush the other side with honey. Roast for another 25 minutes. The pork is done when the outsides begin to crisp up, the edges blacken a bit, and the center of the pork belly strip feels firm. (160F internal temp)
– Remove the pork from oven and let it cool for 5 to 10 minutes. Transfer to a cutting board and cut into thin slices or thicker chunks. Arrange the slices on a plate and serve.
This stuff is also great diced in fried rice, or served alongside some sauteed Chinese greens like baby bok choi.
My husband used to wax nostalgic about something he’d have at school for lunch that had taco meat and crushed Frito corn chips in it. Don’t worry, that’s not what I made for dinner here.
So when I saw a version of this recipe somewhere, I decided to make it my own. The original recipe has refried beans and extra salsa, which I took out. I think the salsa is a bit unnecessary since there’s fresh tomatoes in it, and the beans I omitted because the beef adds enough protein. The refried beans can be full of fat. You can certainly add a can of black beans, though, if you miss that flavor.
It wasn’t my husband’s original elementary school lunch recipe, and thank goodness! We think it’s better :).
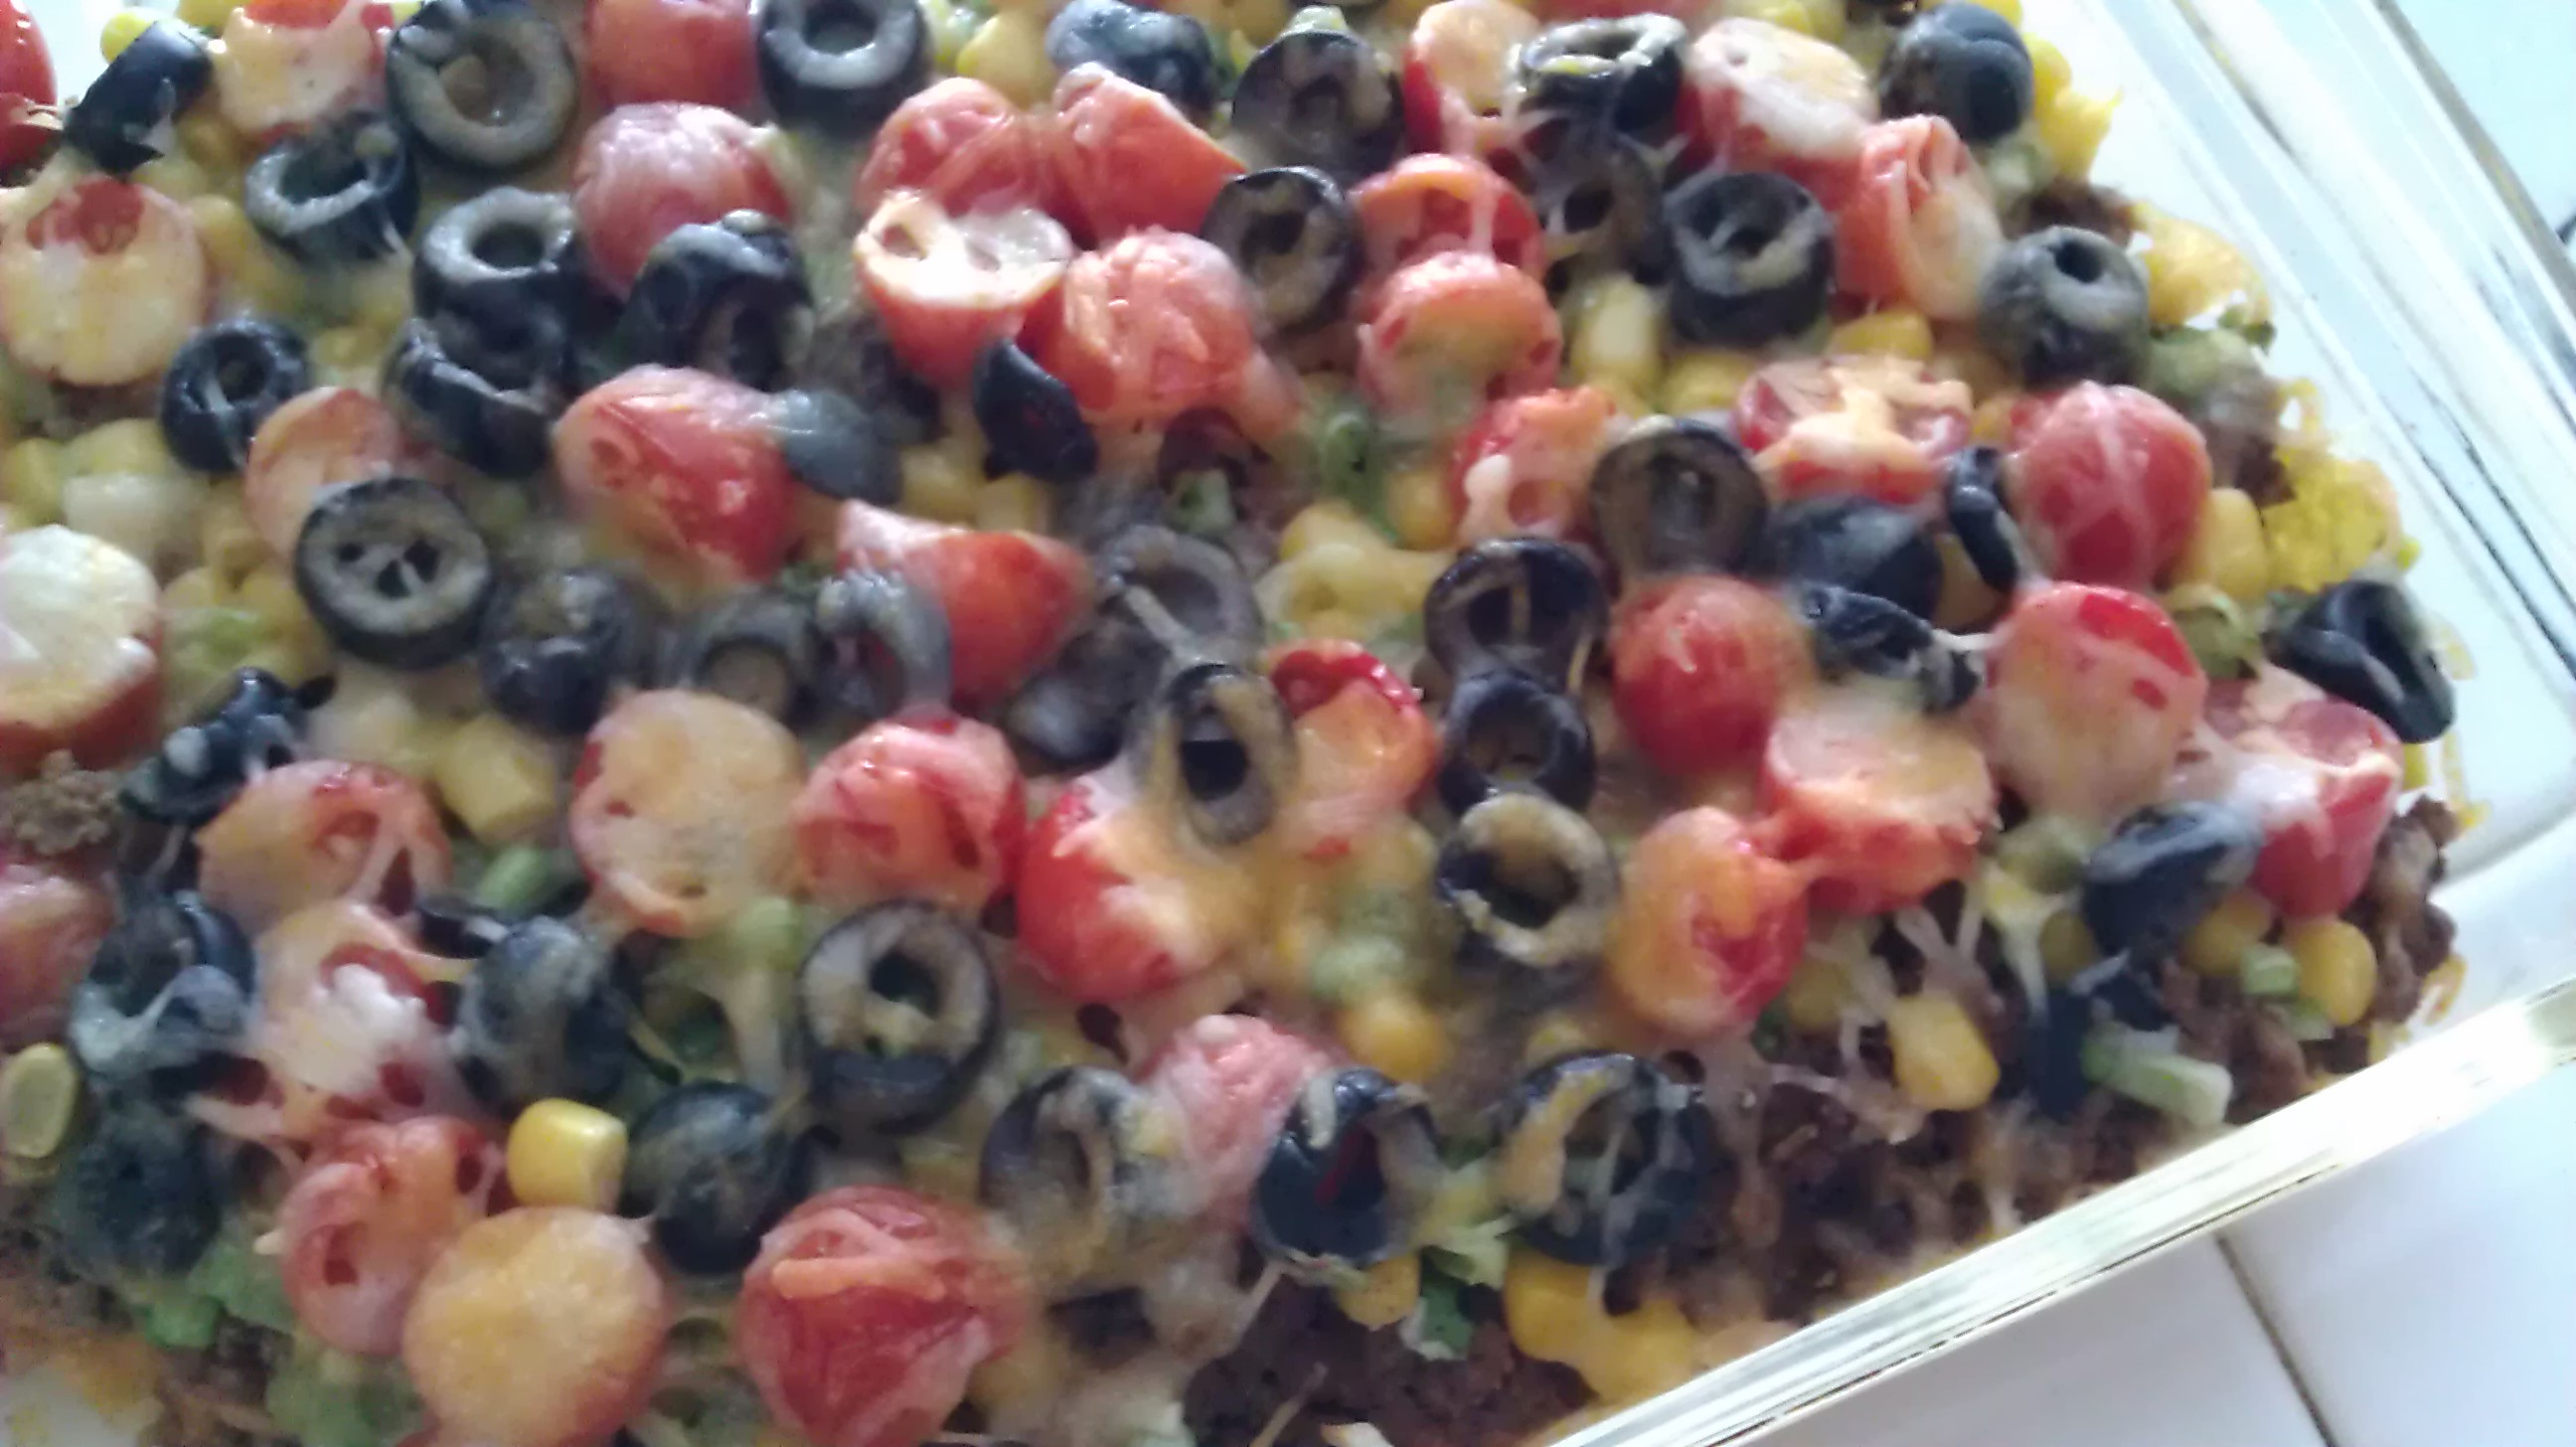
Taco Crunch Bake
1 lbs. ground beef 1 package low sodium taco seasoning 1 cup of corn kernels (canned is fine) 2 cups broken tortilla chips 2 medium tomatoes, diced 1/2 cup sliced olives 1 cup black beans, drained and rinsed (optional) 1 cup shredded cheddar 3 green onions, chopped Plain Greek yogurt 1 sliced avocado Shredded lettuce (optional)
Prepare ground beef with seasoning as directed. Drain well.
Line bottom of 9×11 pan with the chips. Layer the beef on top in on even layer. Follow with the corn, tomatoes, olives, then cheese. Bake at 350F for 20 minutes.
Serve with the yogurt and fresh avocado slices. Add shredded lettuce to make into a taco salad, if desired.
I recently found an easy recipe for some cheesy egg noodles that couldn’t be simpler and satisfied my craving for a macaroni and cheese alternative. I was happy enough with the result, but I wanted to make some alterations to fit the family’s tastes (less dairy, just as creamy, more chicken flavor).
The result is this. It’s so creamy and good without being overly rich.
Cheesy Chicken Noodles
8 oz. package egg noodles
1/2 cup frozen peas
1/2 cup chicken broth, warmed or at room temperature
1 10 oz. can of Cream of Chicken soup
1 cup shredded sharp cheddar
1 cup leftover rotisserie or roasted chicken, chopped (or a can of chicken breast, drained)
1/2 tsp. salt (optional)
Cook the noodles as directed. During the last 3 minutes of cooking, add the peas to the boiling water with the noodles to warm. Drain, then return to the warm pot. Add the broth and turn the heat back on low. Add the soup and the cheese mix until the cheese is melted and everything is blended. Add the salt if desired. Mix in the cooked chicken.
Sunday dinner usually involves roasted chicken at our house. It’s a meal that involves just a little more time than the usual weeknight meal, and it makes the house smell nice and cozy.
But chicken can get old week after week. I’ve also done roast beef, and the pork chops w/apples and onions recipe in my copy of “Mad Hungry” by Lucinda Scala Quinn, which I love.
It’s a great home cooked comfort meal that involves a little prep, but not a lot of effort or time. The pan sauce is absolutely fabulous when served with rice to sop it all up. I make some alterations to the original recipe by adding a little apple cider vinegar. It adds an extra bit of fruitiness while also giving it a little punch with some tang. It’s now become a family fave.
PORK CHOPS WITH APPLES AND ONIONS (adapted from Lucinda Scala Quinn’s Mad Hungry)
6 bone-in pork chops (loin or shoulder), cut 3/4 inch thick
Coarse salt and freshly ground black pepper
1 tablespoon extra-virgin olive oil or vegetable oil
2 tablespoons unsalted butter
1 large white or yellow onion, sliced
2 to 3 apples, cored and sliced (about 3 cups)
1 cup chicken broth
1/4 cup of apple cider vinegar
Trim the chops of excess fat. Sprinkle generously with salt and pepper on both sides. Heat a large cast-iron skillet over high heat, and then swirl in the olive oil. Lay in half the pork chops and don’t move them for a few minutes, to assure a good golden sear forms. Turn and brown well on the second side for a total of about 8 minutes. Transfer the chops to a warm plate. Repeat with your second batch of chops.
Swirl the butter into the pan. Add the onion and apples. Saute until the onion slices are lightly caramelized and the apples have begun to soften, about 8 minutes. Stir in the chicken broth and vinegar. Return chops to the pan and nestle as many of them into the apple/onion mixture to immerse them in the cooking liquid.
Cook until the pork is tender, about 15 more minutes (depending on the size of the chops), turning halfway through and covering the chops with the apple mixture. Serve the chops over rice with a large spoonful of the apple-onion mixture/pan sauce over the top.
Most mornings, I would rather waste precious time squeezing in extra sleep than bother making myself breakfast. Cereal: too cold. Waffles, pancakes, and french toast: too sweet. Oatmeal: too starchy. Bacon: too greasy. And frankly, that early in the morning, the only thing that sounds good are eggs, which take too much time to make. Time I could be stealing to catch some extra shuteye. (I’m not a morning person, can you tell?)
There’s just one problem with this, however. My stomach starts growling in a major way by 10:30am. Totally embarrassing during meetings.
But recently, I found myself with a loaf of whole wheat toast calling my name from the office kitchen. We had cream cheese and hummus in the office fridge too, but just toast and spread didn’t give me a lot of hope that I’d stay full till lunchtime.
When I got home, I noticed a lone avocado sitting in my crisper (I know it didn’t belong there, but it was) that had been in there for way too long. Instead of dumping it in a salad or on a sandwich, I came up with the idea of slicing it and topping it on my toast the next morning.
And so my now “usual” breakfast was born. It is healthy, filling, and full of protein, which I need to get me through the day. And, it’s awesomely tasty. Score.
Avocado Toast
Half a ripe Haas avocado, sliced Cream cheese spread or hummus (I like spicy, garlic or roasted red pepper) 2 slices of whole wheat bread
-Go ahead and toast your bread slices till they’re golden brown. You’ll appreciate the crunch, so make sure you get them nice and toasty.
-Then spread on your cream cheese or hummus, and top with avocado slices.
-You can also sprinkle them with some black pepper and sea salt, thin red onions, or even a fried egg on top. Personalize it and enjoy!
*To store the extra half of your avocado, make sure you leave the pit in it. This will prevent browning and keep it fresher, longer. Store in a zipper bag in the fridge.
Gluten Free Lemon Pudding Cake (photo by VirgoBlue)
You know the story: Someone gives you a bunch of lemons from their meyer lemon tree in the backyard (since they have more than they know what to do with), and next thing you know you’re digging around for some lemony recipes that go beyond the typical lemonade or lemon bars. Or maybe I’m just lucky that I know folks who will give me their lemons :).
I’m thrilled to get people’s homegrown surplus produce. It gives me a chance to experiment with the freshest fruits and veggies that haven’t been tainted by traveling cross-country in the back of a huge truck.
Meyer lemons are a favorite. They’re less tart (but still sour, of course) and have this flowery, perfumey, quality to them. They’re also more orange than they typical yellow lemon, and have a softer, thinner skin and fragrant zest.
I found this recipe from Lynn’s Kitchen Adventures that I adapted slightly to include some of the perfumey zest from the meyer lemons. It seemed like a waste not to. I also added less sugar, and gave it a little extra time in the oven to set a bit more. Let me know how it turns out. Ours was a big hit.
2 large eggs, separated, room temperature
2 tablespoons butter, softened
1/2 cup sugar
¼ cup lemon juice
1 teaspoon lemon zest
1 tablespoon rice flour
1 tablespoon cornstarch
3/4 cup milk
Heat the oven to 350 degrees.
Grease an 8×8 baking pan or casserole dish.
Mix the butter and sugar together until fluffy, about 2 minutes. Add the egg yolks and mix well.
Add the rice flour, cornstarch, and beat until combined.
Add the lemon juice and milk and beat until incorporated. Set aside.
Beat the egg whites to soft peaks in a separate bowl. Fold them into the other mixture.
Pour the batter into the prepared dish. Then, to create a water bath, place the dish in a larger baking pan and add enough boiling water to the outer pan so that it reaches halfway up the sides of the inner dish.
Bake until the top is golden and the center springs back when gently pressed, about 35 to 40 minutes. Let cool completely.
By the time food trends like bacon-flavored-everything and cupcakes reach supermarket shelves, they’ve already been flaunted by multiple food companies at the Fancy Food Show. This convention of sorts is where the worlds food purveyors, big and small, come to show off their newest creations. It’s where food trends are born, both artisan and mainstream.
This year’s 38th annual show was bigger than ever with 1,300 exhibiting companies and 18,000 attendees at the Moscone Center in San Francisco. Here’s the Top 5 most interesting trends I spotted at the event.
1. Strange things are going on with tea:
This year, I saw a focus on teas with added benefits like probiotics and herbs that aid in replenishing or adding to your workout routine (think Vitamin Water but with brewed tea). But the weirdest of them all was a line of savory teas with flavors like Beet Cabbage, Broccoli Cilantro and Spinach Chive. Described as “not quite a soup and more than a tea,” it seemed to have an identity crisis built right in. But once I tried it, I surprisingly, didn’t hate it.
2. Cooking with Hemp:
I recently tried a scalloped potatoes dish with hemp cream that I loved, so I was intrigued to see the emergence of shelled hemp seeds this year. It is more a textural experience (chewy and a bit like teeny tiny quinoa) than a flavorful one (doesn’t add any). You sprinkle them on your yogurt or fish like you would granola. Apparently they’re loaded with health benefits and give you sustained energy. And no, you won’t get high off this stuff so there’s no point in adding it to those brownies.
3. Cherries are the new pomegranate:
Move over pomegranates! Cherries are apparently superior to all your much-touted antioxidant goodness. Tart cherry juice reduces inflammation, has naturally occurring melatonin to help you sleep, and it fights heart disease. I personally prefer the taste of cherry juice to pomegranate, which can be way too tart for me.
4. White cheddar popcorn is so passe:
Seems cheddar is just too boring when it comes to a bag of gourmet popped corn. I saw varieties like blue cheese, butter toffee, hatch chili con queso, chipotle lime, sun-dried tomato parmesan, and smoked gouda. Popcorn has entered potato chip territory with these adventurous new flavors.
5. Squeeze pouches aren’t just for kids anymore:
If you have children, you’ve seen those squeeze pouches of wholesome applesauce that are lifesavers because of their convenient, mess-free packaging and perfect portions. So why limit them to just the kids? Active adults will love smoothies, pureed antioxidant-rich fruit, and even veggie combinations in squeezable portable pouches just as much as the little ones.
6. Ice cream sandwiches are the new cake pop:
Seems like every year there’s a new hand-held dessert trend. Gone are cupcakes, cake pops, and whoopie pies. Gourmet ice cream sandwiches will be hitting your supermarket’s freezer by mid-year from some of the best gourmet ice cream makers.
Aida Mollenkamp, former editor of CHOW and star of both the Food Network and the Cooking Channel, wants to provide the home cook with a go-to kitchen resource. That is why she wrote her new book “Keys to the Kitchen.” Marketed as a cookbook, it’s much more than that. In the book, she breaks cooking down to one simple equation:
Quality Ingredients (The Set-Up) + Kitchen Skills (The How-To) + Technique (The Recipes) + Cooking Method (The Riff) = GOOD FOOD
With hundreds of recipes and more cooking techniques than you ever knew you needed, “Keys to the Kitchen” could almost serve as a cooking class textbook. But of course, Aida makes it much more exciting than that. She’s encouraging home cooks to be more adventurous in the kitchen and not to be afraid to try new techniques and tastes. By providing some basic principles to purchasing, preparing and cooking food creatively she promotes the development of an adventurous approach to eating.
With the book coming out this month and a possible new show on the horizon, she’s hard to catch up with, but fortunately she carved out some time to talk about her new book and share some key tips with Bay Area Bites.
What is it about food that still excites you?
AM: I stay excited because everyday presents an opportunity for a new food adventure. Whether it’s something as simple as buying an ingredient you’ve never used before, cooking a dish for the first time, or traveling somewhere and eating a new flavor, there’s always something out there.
What are your 5 best tips for being more adventurous in the kitchen?
AM:
Follow flavors you like
Don’t think of your favorite recipe merely as one dish but rather as layers and layers of flavors. With that mentality, taste and dissect the details at your next dinner. Who knows? You may think you dislike a spice or ingredient only to realize it’s in a lot of the foods you love.
Travel through your taste buds
Many a food lover pines for the chance to eat fresh fried samosas in the streets of India or shop firsthand at renowned food markets, like Mexico City’s La Merced, but few of us can afford that reality. Instead, live vicariously through their food — though you won’t have souvenirs, you’ll rack up plenty of food memories.
Buy something new every time you shop
Consider each trip to the market as a chance to explore and aim to buy a new (if only to you) ingredient each time you shop. Sure, you may encounter a few duds, but more often than not, you’ll be pleasantly surprised and realize you actually love sauerkraut.
Think of your kitchen as a lab
Change your perspective and think of cooking not as drudgery but as your daily chance for culinary creativity. And really, it’s a lab with pretty low risk — the worst-case scenario is that the dog ends up being fed really well.Start simple by swapping the herbs and spices in your favorite recipes, then graduate to using ingredients you’ve never tried.
Make mealtime mash-ups
With cooking experimentation comes rule breaking, so don’t be scared — just go with it. In the last few years, all sorts of ethnic flavors have (like music) been mashed up into cross-cultural dishes — like the now ubiquitous Korean tacos.Take a page from that trend and try a spin on your favorite foods, like chorizo on a gyro, kimchi in a Bloody Mary, Madras curry spices whirred into your vanilla ice cream, or any other twist that will help you forge your own food adventure.
This doesn’t seem like your typical cut and dry recipe cookbook. What was your inspiration?
AM: That’s right. While a lot of cookbooks are a catalogue of recipes, “Keys to the Kitchen” is more of a kitchen reference combined with a cookbook. It’s a modern manual to the kitchen that teaches you how to shop, covers basic kitchen techniques, and then culminates with over 300 original recipes that cover everything from an elegant holiday-worthy roast to ideas for reinventing last night’s leftovers.
I wrote the book for my friends who like food but are intimidated by the kitchen because they were never taught to cook. Over and over again, I’d have people ask me the same general questions — things like how to read labels, which cuts of meat are best for which preparations, and recipes for interesting but accessible recipes. I wrote “Keys to the Kitchen” to provide those answers and to help people become better cooks, whether it’s their first time turning on the stove or the one-thousandth.
What’s coming up for you after the launch of the cookbook? More television? More writing?
AM: Well, the rest of the year will be devoted to my multi-city book tour. From mid-September through the holidays, I’ll be traveling to 14 different cities for book signings, demos, and other in-person cooking events.
After that, I’m going to start developing a new show that I, unfortunately, can’t talk about too much right now. But, I promise to keep you posted as it develops.
1) Fall’s here and I like making comfy one-pot meals that are hearty.
2) I love Hamburger (and Tuna) Helper.
I admit it, I love that boxed stuff and can easily sit by the television with a big bowl of it. That and Velveeta and Shells. I know there’s nothing “real” or good for you about Velveeta, but sometimes, you just don’t care.
Anyways, if I can make a version of Beefy Tomato Macaroni from scratch so the guilt of making a boxed meal doesn’t have to enter my head, and the recipe is simple enough, I’ll do it.
Enter this recipe.
It’s not hard to make at all and if you use the right ingredients, it’s wonderful. I pulled the original recipe off the back of a can of diced tomatoes (which you’ll need for this) and then decided to tinker with the flavors.
It’s so yummy, your kids will ask for seconds. My husband asked for thirds.
Enjoy.
BEEFY TOMATO PASTA (MAC)
1 14.5 oz. can diced tomatoes (I use Trader Joe’s Fire Roasted Diced Tomatoes w/Green Chilies for a little mild spicy kick)
1 8 oz. can tomato sauce
1 15 oz. can corn
1 lb. ground beef, defrosted thoroughly (I like to use organic)
1 small yellow onion, diced
1 clove garlic, minced
1 tsp. celery salt
1 tsp. dried thyme
1 Tbsp. Worcestershire sauce
2 tsp. salt
2 cups of of low-sodium chicken broth or water
1 12 oz. package of macaroni or spiral pasta (I used brown rice pasta since my husband is gluten-free)
2 Tbsp. olive oil
Heat the oil in a saute pan or dutch oven over medium heat until the oil shimmers. Add in the onions, garlic and 1/2 tsp. of the salt. Saute until onions are translucent (about 4 min).
Add in your ground beef and make sure to break it up well. Saute until browned, about 5 min.
Add in all the other ingredients. Let it come to a boil, cover, then simmer for 10-12 minutes, stirring occasionally to make sure it doesn’t stick to the bottom of the pan.
Test the pasta for doneness after the 10 minutes and add on additional cooking time if necessary. Stir, turn off the heat and let sit for about 5 minutes, uncovered, so the liquid will further absorb and the mixture will thicken.
 The evening before you have to go back to school/work after a long weekend or vacation always sucks. At least it always has for me. Even as a kid I remember the dread I felt as I crawled into bed the night before the first day of school after summer vacay was over.


You must be logged in to post a comment.